
Introduction
Recently, I grabbed a Mamiya C330 Professional TLR camera off of ebay. The camera works great and I love the look and feel of the TLR form factor. The problem is, the camera doesn’t have a light meter inside to gauge the exposure of a scene. In-camera light meters only really gained traction in the late 60’s and early 70’s, but didn’t become more accurate until the 80’s. My Canon AE-1 Program has a light meter inside which allows it to automatically set the aperture in AE mode.
I looked around for light meters that weren’t too expensive, but I didn’t find many. New light meters are at least $150, even “analog” ones. Instead of rummaging through listings on ebay or craigslist to find a used meter, I thought it might be easier to just build one. After a few false starts, I was able to build a light meter without too much hassle and for a lot less than most commercial meters.
I’m not quite finished with the project yet, but I wanted to put together a little build post about how I designed the system, what components I used, and how I tested it.
Components
This is a preliminary list of components to get the project off the ground. Once we get past this phase, we will need more parts to make this a hand-held device.
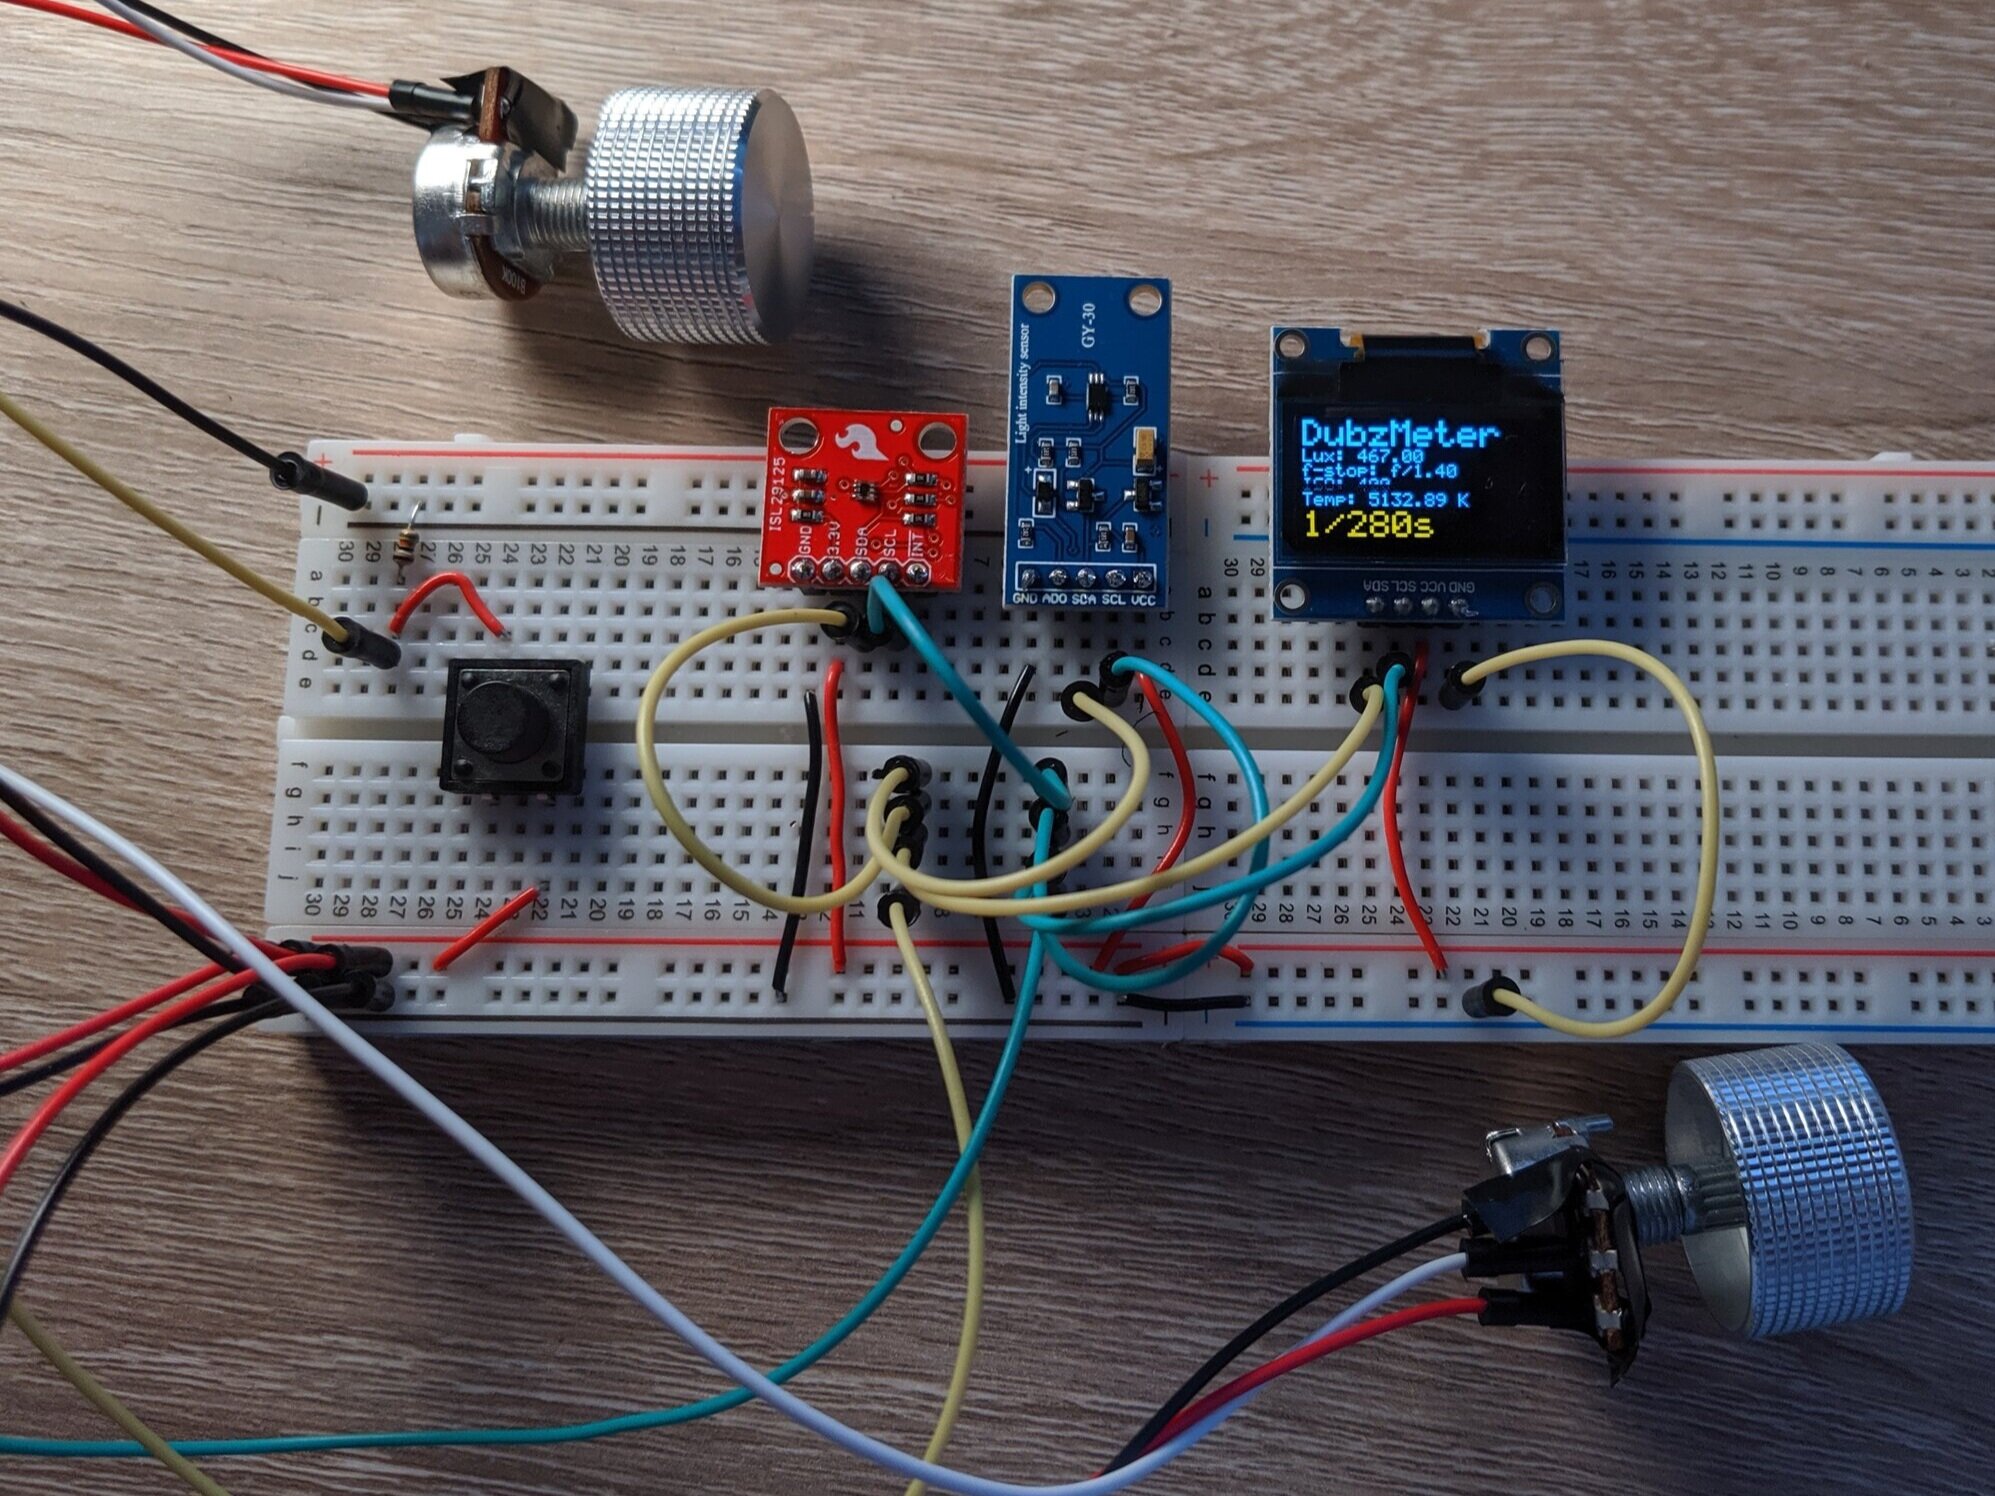
Arduino UNO Microcontroller (SparkFun - $22.95)
2x Rotary Linear Potentiometers - 100K Ohm (SparkFun - $1.50 ea)
2x Rotary Knobs (SparkFun - $1.50 ea)
1x Pushbutton Switch (SparkFun - $0.50 ea)
1x SparkFun ISL29125 RGB Light Sensor (SparkFun - $7.95)
1x BH1750FVI Lux Sensor (Digi-Key - $13.44, or similar)
1x 0.96” 128x64 OLED Display Module w/SSD1306 Driver (Amazon - $8.99)
A few breadboards
Lots of wires and a few resistors
I bought a weather-station kit on Amazon that had both the Lux sensor and the OLED display module, plus a few wires: ESP8266 - $19.99
Logic
(Before diving too deep into a project like this, I generally think it is important to figure out what you actually want to accomplish)
Primary Functionality - A user is able to set the ISO and Aperture (f-stop) that they desire. Then, on an action (button press) the system will produce a shutter speed that normalizes the exposure. If a user wants to change either the aperture or ISO, they should be able to do so without re-metering the scene so the system needs to be able to hold the Lux value and recalculate the exposure settings on the fly.
Secondary Functionality - Using a similar method, the system will output the current light color (white balance) when the exposure is requested.
Tertiary Functionality - Trigger a flash when the button is pressed to read the artificial exposure of the scene. This can be done with a PC sync connection.
Quaternary Functionality - Same as above but with an IR or RF signal.
Skills Required
Basic circuitry knowledge
Basic soldering skills
Intermediate software skills
A good grasp of math
Understanding of light (we will get into this a bit more in future posts)
Next up
How light meters work
Math math math!